Home Assistant Smart Lock Setup Without Cloud Dependence
Connect smart locks to Home Assistant with local control, safe automations, guest codes, alerts, and conservative unlock rules.
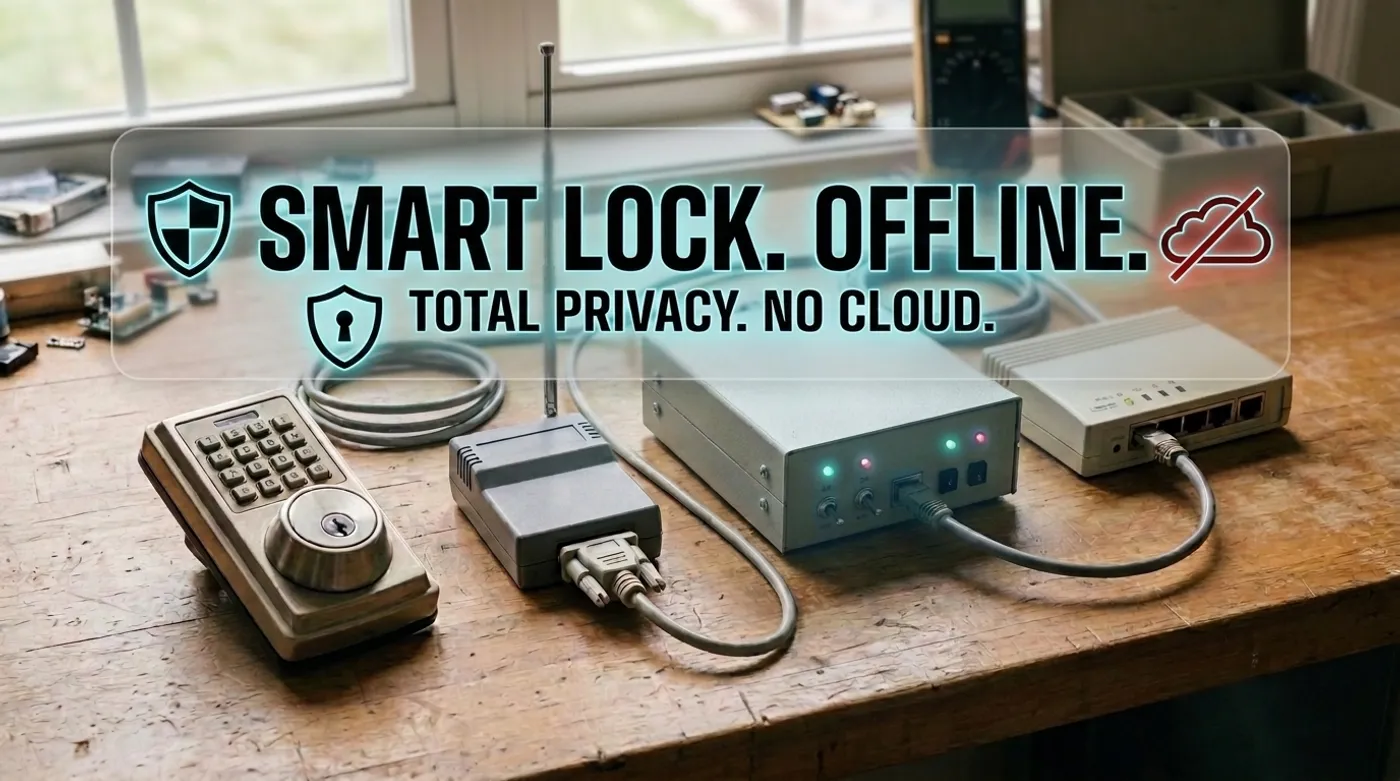
Connect smart locks to Home Assistant with local control, safe automations, guest codes, alerts, and conservative unlock rules.
Putting a smart lock in Home Assistant is easy. Making it reliable enough that the household stops thinking about it is the actual job.
The mistake is treating the lock like a light bulb. A bad light automation is annoying. A bad lock automation can leave someone outside, unlock at the wrong time, or train everyone to ignore alerts. This is one of the few smart home areas where boring engineering is not optional.
If you are still choosing hardware, start with How to Choose a Local-First Smart Lock Without Buying App Dependency. This post assumes you already have, or are planning to use, a lock that can report state and accept commands through a local controller.
The Architecture I Would Trust
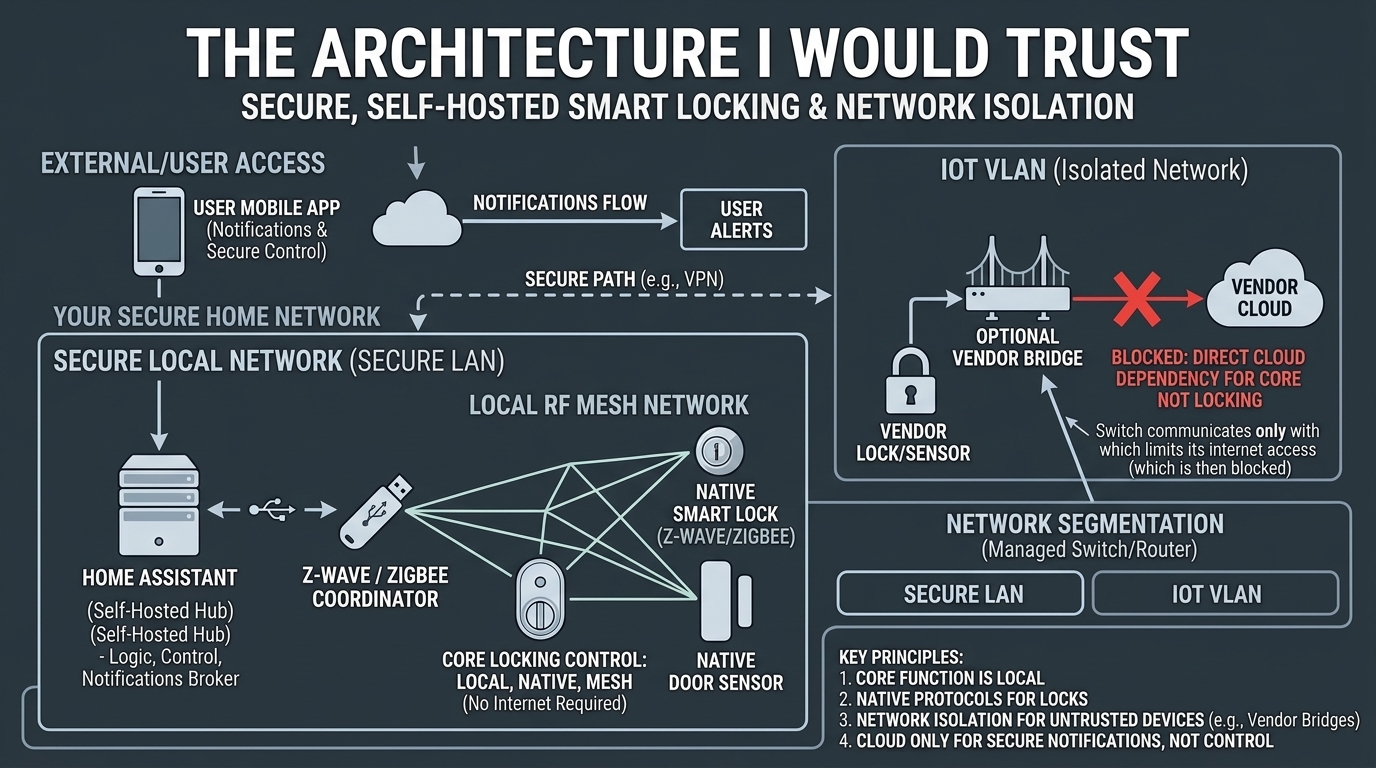
A practical local setup looks like this:
Smart lock
  -> Z-Wave, Zigbee, or Matter local radio
  -> Home Assistant coordinator or controller
  -> Home Assistant automations, scripts, alerts
  -> phone notifications and dashboards

Optional:
  -> vendor bridge on IoT VLAN for firmware or app-only features
Representative network:
Main LAN:       10.10.0.0/24
Home Assistant:10.20.0.20
IoT VLAN:       10.40.0.0/24
Guest Wi-Fi:    10.60.0.0/24
If the lock talks through Z-Wave or Zigbee, it does not need an IP address. That is good. It means the lock is not another Wi-Fi client with cloud habits, DNS chatter, and a half-forgotten embedded web stack.
If a vendor bridge is required, isolate it:
- allow bridge to reach only the destinations it truly needs
- allow Home Assistant to reach the bridge if local integration requires it
- block guest and random client networks from the bridge
- avoid exposing the bridge admin UI across the LAN
Do not build the access path so that the lock needs vendor cloud for local entry. Remote notifications can use the internet. Basic lock state and local control should not.
Pair the Lock Like Infrastructure
For Z-Wave:
- use Z-Wave JS or Z-Wave JS UI
- build the powered mesh first and include the lock at its installed location when possible
- do not move the Z-Wave adapter around for inclusion; fix coverage with powered repeaters
- use secure inclusion when required for lock command classes
- check that lock, unlock, battery, and alarm/jammed states appear
- wake the lock manually during configuration if it sleeps aggressively
For Zigbee:
- use a stable coordinator and current Zigbee2MQTT or ZHA setup
- build the powered mesh first, then pair and verify the lock at the door
- confirm the lock routes reliably after it is installed on the door
- avoid assuming every router device is happy relaying lock traffic
- check exposed entities before writing automations
For Matter:
- confirm whether Home Assistant is acting as a Matter controller
- verify lock/unlock, battery, and state reporting
- test after controller reboot
- test without WAN
- do not assume all vendor-specific features are exposed through Matter
After pairing, create a small state table for yourself:
| Thing to verify | Expected result |
|---|---|
| Manual lock from thumb turn | Home Assistant state changes |
| Manual unlock from key or keypad | Home Assistant state changes |
| Lock command from Home Assistant | Deadbolt moves fully |
| Low battery | Battery entity updates |
| Jammed bolt | Fault or alarm entity appears |
| Internet disconnected | Local state and keypad still work |
If you cannot verify these, do not write automations yet. You are missing observability.
Home Assistant’s current Lock integration documentation lists locked, unlocked, jammed, unavailable, and transitional states. The exact subset still depends on the device integration. Its Z-Wave documentation also recommends keeping the adapter in place during inclusion and preserving the generated security keys.
Entity Naming That Will Not Hurt Later
Use boring names:
lock.front_door
sensor.front_door_lock_battery
binary_sensor.front_door_lock_jammed
sensor.front_door_lock_last_user
Actual entity names depend on the integration. Rename them in Home Assistant so automations read like a person wrote them, not like a pairing process sneezed into YAML.
Good names make future debugging easier:
alias: Front door lock battery low
triggers:
  - trigger: numeric_state
    entity_id: sensor.front_door_lock_battery
    below: 25
actions:
  - action: notify.mobile_app_renan_phone
    data:
      title: "Front door lock battery"
      message: "Battery is below 25%. Replace it before it becomes a front-door problem."
Replace the notify service with your actual mobile app target. The logic is the point.
Safe Automations for Smart Locks
Good lock automations are conservative. They reduce mistakes. They do not try to be clever at the cost of access control.
I would start with these:
Lock at Night if the Door Is Closed
alias: Lock front door at night
triggers:
  - trigger: time
    at: "23:00:00"
conditions:
  - condition: state
    entity_id: binary_sensor.front_door_contact
    state: "off"
actions:
  - action: lock.lock
    target:
      entity_id: lock.front_door
  - action: notify.mobile_app_renan_phone
    data:
      title: "Front door"
      message: "Locked automatically at 11 PM."
Use a door contact sensor. Do not command a deadbolt into an open door and act surprised when the motor complains.
Alert if the Door Is Left Unlocked
alias: Front door left unlocked
triggers:
  - trigger: state
    entity_id: lock.front_door
    to: "unlocked"
    for: "00:10:00"
conditions:
  - condition: state
    entity_id: binary_sensor.front_door_contact
    state: "off"
actions:
  - action: notify.mobile_app_renan_phone
    data:
      title: "Front door unlocked"
      message: "The front door has been unlocked for 10 minutes."
This is better than auto-locking immediately every time. People carry groceries, talk to neighbors, and sometimes use doors like doors.
Lock When Everyone Leaves, but Carefully
Presence is useful, not sacred.
alias: Lock front door when everyone leaves
triggers:
  - trigger: state
    entity_id: group.household
    to: "not_home"
    for: "00:05:00"
conditions:
  - condition: state
    entity_id: binary_sensor.front_door_contact
    state: "off"
actions:
  - action: lock.lock
    target:
      entity_id: lock.front_door
  - action: notify.mobile_app_renan_phone
    data:
      title: "Front door"
      message: "Locked after everyone left."
The five-minute delay is intentional. Phone presence can lag. Wi-Fi roaming can be weird. Bluetooth can be worse. Let the signal settle before the lock moves.
Automations I Would Not Run
I would avoid:
- unlock when a phone arrives home
- unlock when a car enters the driveway
- unlock when a face is recognized by a camera
- unlock after a voice command without confirmation
- unlock based on one motion sensor or geofence event
- expose raw lock control to a local AI model
Unlock automations need a higher bar than lock automations. Locking a closed door at night is usually a safe correction. Unlocking a door because one signal guessed wrong is how convenience turns into an incident report.
If you use a local AI layer, expose a script that can report lock status or request confirmation. Do not hand the model direct lock authority. The same safety pattern applies from Why Local Home Automation Gets Better With a Local AI Layer: expose narrow scripts, not the whole house.
Guest Codes Without Chaos
Guest access is where smart locks are genuinely useful.
A clean pattern:
- permanent code for each resident
- temporary code for each contractor or guest
- expiration for short-term access
- separate code for cleaner, pet sitter, or maintenance
- notification when a non-resident code is used
- monthly review of active codes
Example notification:
alias: Front door guest code used
triggers:
  - trigger: event
    event_type: zwave_js_notification
conditions:
  - condition: template
    value_template: "{{ 'Keypad unlock' in (trigger.event.data.label | default('')) }}"
actions:
  - action: notify.mobile_app_renan_phone
    data:
      title: "Front door unlocked"
      message: "A keypad code unlocked the front door. Check the lock history."
The exact event type and fields depend on your integration. Z-Wave, Zigbee, Matter, and vendor bridges expose code events differently. Treat this as a pattern, not a paste-and-forget recipe.
For code management, I prefer Home Assistant dashboards or integration-supported code slots over a vendor-only app. If the vendor app is the only place that knows who has access, your local dashboard is missing part of the access-control story.
Door Contact Sensors Are Not Optional
A lock state alone tells you whether the deadbolt is extended. It does not prove the door is closed.
Use a contact sensor:
Door closed + deadbolt locked   = secured
Door closed + deadbolt unlocked = unlocked
Door open + deadbolt locked     = bad state or someone locked it open
Door open + deadbolt unlocked   = open
That distinction matters for automations. If you only look at lock.front_door, you can end up with Home Assistant proudly reporting “locked” while the door is physically open. Computers are very good at being technically correct in the least helpful way.
Power and Recovery
Locks are battery devices. Hubs are powered devices. Both need planning.
For the lock:
- keep spare batteries in the house
- test the physical key or external jump-start method
- set battery alerts at 25 percent and 15 percent
- check motor strain if batteries drain quickly
For the controller:
- put Home Assistant, coordinator, router, and access point on a small UPS
- document how to restart Z-Wave JS, Zigbee2MQTT, or Matter services
- keep a manual entry path independent of Home Assistant
- test lock behavior during a WAN outage
If Home Assistant is down, the keypad and key should still work. If they do not, you built a dependency chain that is too fragile for the front door.
Testing After Every Change
After firmware updates, integration changes, coordinator moves, or Home Assistant upgrades, test the lock:
- lock and unlock manually
- lock and unlock from Home Assistant
- verify door contact state
- verify battery state
- use a guest code
- revoke a guest code
- disconnect WAN and repeat basic local behavior
- reboot Home Assistant and confirm the lock returns to the right state
This is not paranoia. It is maintenance for access control. The lock is allowed to be smart, but it does not get to be mysterious.
Final Rule
Home Assistant should make a smart lock more observable and more predictable. It should not make entry depend on a fragile stack of app state, cloud APIs, geofence guesses, and wishful YAML.
Start with local radio control, door contact confirmation, conservative lock-only automations, clear battery alerts, and tested guest code management. Add convenience slowly. If an automation can unlock the door, it needs a better reason than “the phone probably arrived.”
Keep reading
Related guides
How to Choose a Local-First Smart Lock Without Buying App Dependency
Choose a smart lock by protocol, fallback access, battery behavior, and local control instead of app polish or cloud features.
Smart Lock Troubleshooting: Battery, Keypad, Hub, and Door Problems
Diagnose smart lock failures by separating mechanical alignment, battery, keypad codes, local hub state, and cloud dependency.
AI Energy Management With Home Assistant and EMHASS
Use EMHASS with solar forecasts, dynamic tariffs, EV charging constraints and deterministic Home Assistant fallbacks.