Read a Solar Inverter Over Modbus RTU and Publish It to MQTT
Build a local Modbus RTU to MQTT path for solar inverter telemetry without depending on a vendor cloud dashboard.
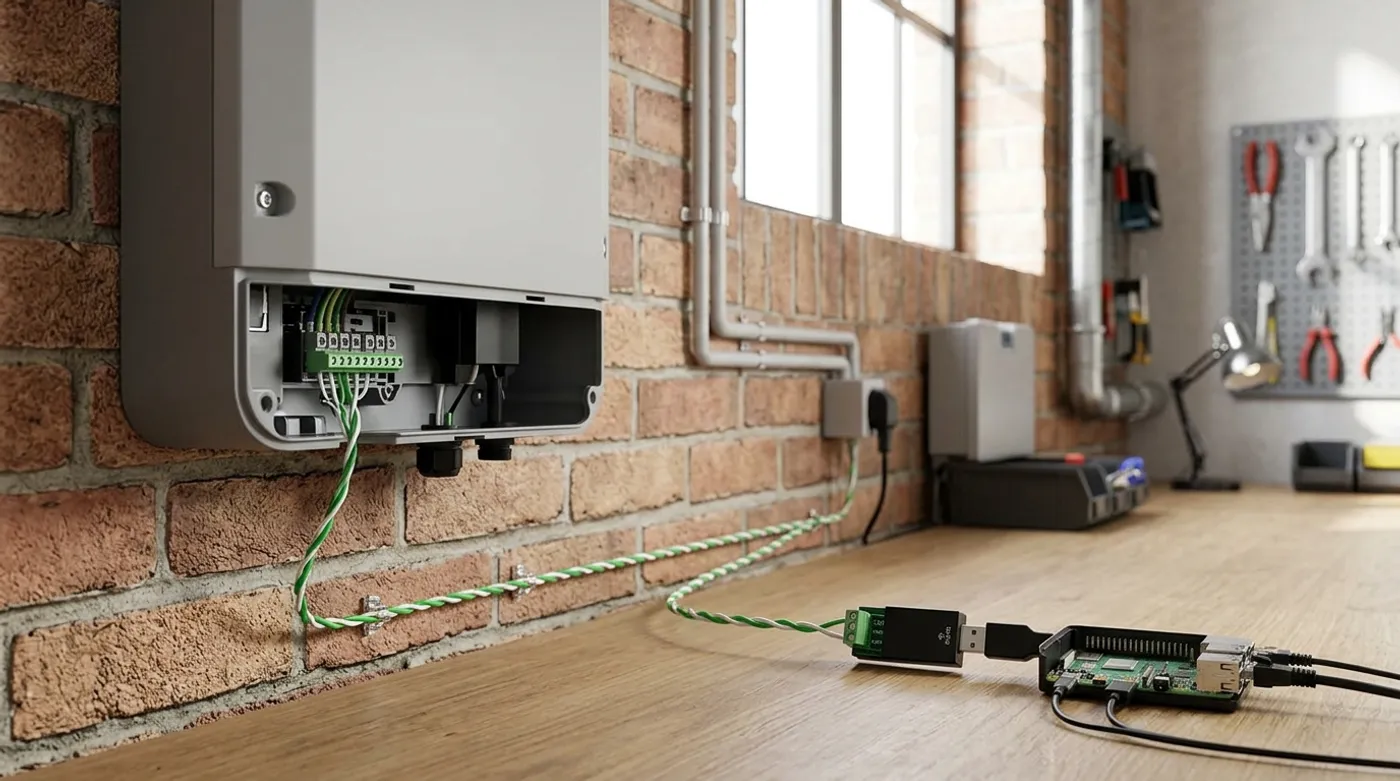
Build a local Modbus RTU to MQTT path for solar inverter telemetry without depending on a vendor cloud dashboard.
Most inverter apps are fine until you want the data to be yours. Then you discover the dashboard updates when it feels like it, the vendor API has opinions, and your energy automations depend on a server you do not control. Excellent. Exactly what everyone wanted from a device bolted to their house.
A local Modbus RTU to MQTT bridge fixes the control path. The inverter exposes registers over RS-485. A local host reads those registers. MQTT publishes clean topics. Home Assistant subscribes. No cloud polling, no mystery refresh interval, and no waiting for the vendor portal to remember your roof exists.
What This Setup Does
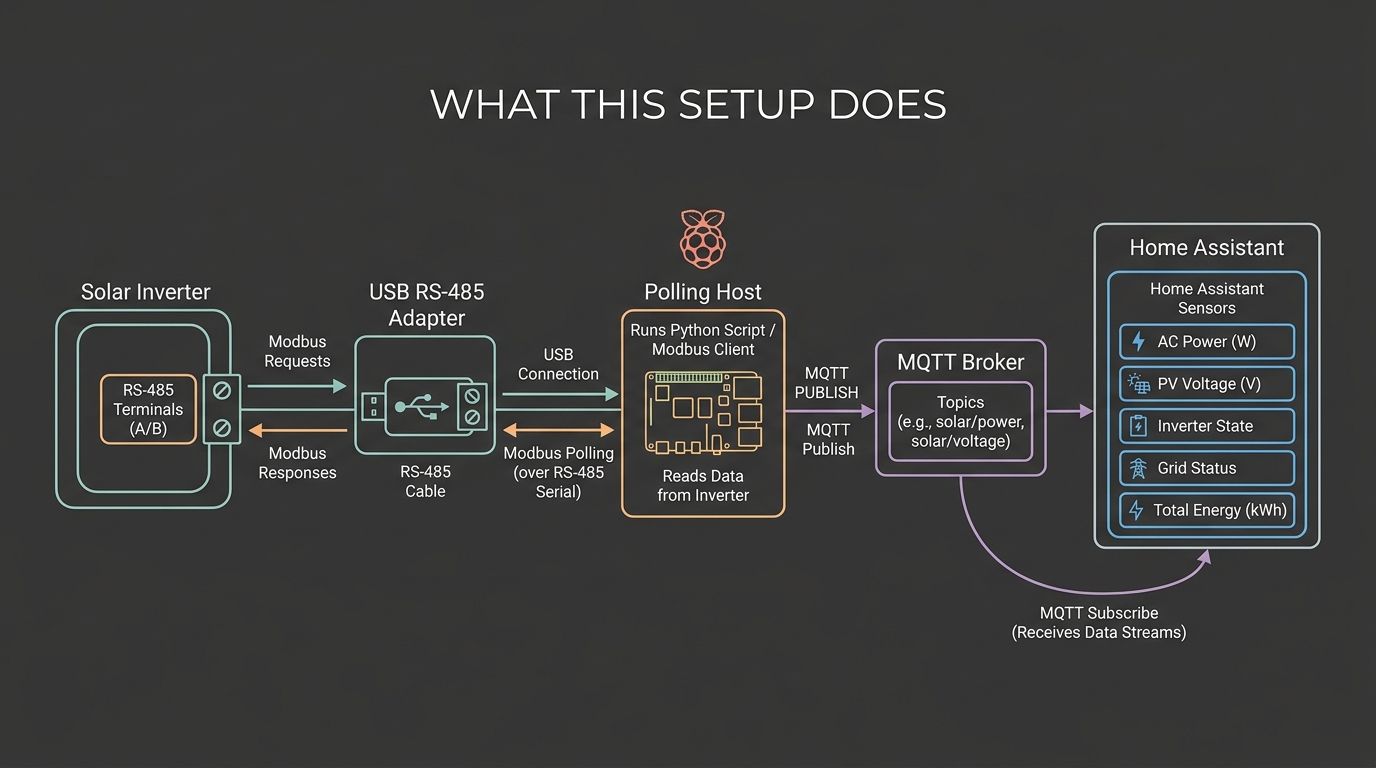
The flow is simple:
Solar inverter RS-485 port
  -> USB RS-485 adapter
  -> local Linux host
  -> Modbus RTU polling
  -> MQTT broker
  -> Home Assistant sensors
The search results around Modbus to MQTT are split between industrial tutorials, GitHub firmware, commercial gateways, and forum threads where someone is stuck because the documentation is either missing, wrong, or translated by a toaster with a grudge. The missing article is the practical home version: wire the bus, poll the inverter, publish sane MQTT payloads, and debug the failures without guessing.
Hardware and Assumptions
Use this as the baseline:
- inverter with RS-485 / Modbus RTU support
- USB RS-485 adapter attached to a Linux host
- twisted pair cable for A/B
- 120 ohm termination resistor if the bus needs it
- MQTT broker such as Mosquitto
- Home Assistant on the same LAN or server VLAN
Example network:
Home Assistant: 10.20.0.20
MQTT broker:    10.20.0.20
Modbus host:    10.20.0.30
Inverter:       Modbus slave ID 1
Serial port:    /dev/ttyUSB0
Baud rate:      9600
Parity:         none or even, depending on inverter docs
The values above are not universal. Modbus is not magic. If the inverter says 9600 8N1, use that. If it says 9600 8E1, use that. If you guess because “it worked once on a forum,” congratulations, you have invented intermittent telemetry.
Wire RS-485 Without Making It Weird
RS-485 usually gives you two data lines: A and B, sometimes labeled D+ and D-, sometimes labeled the opposite because apparently the industry needed a hobby. Keep the cable short for the first test. Connect inverter A to adapter A, B to B, and ground only if the device documentation calls for it and you understand the grounding path.
Practical wiring rules:
- use twisted pair, not random alarm wire from a drawer
- keep the first test short
- avoid running the RS-485 cable beside mains AC
- use one master on the bus
- add termination only when the bus length/topology needs it
- document which side you call A and B
If the bus is silent, swap A/B once. Do not swap it twelve times while also changing baud rate, parity, slave ID, cable, and software. That is not troubleshooting. That is a ritual.
Install the MQTT Broker
If Home Assistant already runs the Mosquitto add-on, use it. If the bridge runs on a separate Linux host, a standalone broker is fine.
On Debian or Ubuntu:
sudo apt update
sudo apt install mosquitto mosquitto-clients
sudo systemctl enable --now mosquitto
Test publish and subscribe:
mosquitto_sub -h 10.20.0.20 -t 'test/modbus'
mosquitto_pub -h 10.20.0.20 -t 'test/modbus' -m 'online'
Do this before touching Modbus. If MQTT does not work, adding RS-485 will not improve the situation. It will just give you two broken things and a longer evening.
Poll the Inverter
Use a simple Python poller first. This is easier to debug than jumping straight into a full gateway stack.
Install dependencies:
python3 -m venv /srv/modbus-mqtt/.venv
/srv/modbus-mqtt/.venv/bin/pip install pymodbus paho-mqtt
Minimal polling shape:
from pymodbus.client import ModbusSerialClient
import json
import paho.mqtt.publish as publish

client = ModbusSerialClient(
    port="/dev/ttyUSB0",
    baudrate=9600,
    parity="N",
    stopbits=1,
    bytesize=8,
    timeout=2,
)

if not client.connect():
    raise SystemExit("Modbus connection failed")

result = client.read_holding_registers(address=0, count=10, slave=1)
if result.isError():
    raise SystemExit(f"Modbus read failed: {result}")

payload = {
    "raw_registers": result.registers,
}

publish.single(
    "solar/inverter/raw",
    json.dumps(payload),
    hostname="10.20.0.20",
)

client.close()
This reads raw registers. It does not yet pretend register 0 is voltage or register 7 is PV power. Do not name values until you have the inverter register map. Wrong labels are worse than no labels because they look official while lying to your automations.
Convert Raw Registers Into Useful MQTT Topics
Once you know the register map, publish stable topics:
solar/inverter/pv_power_w
solar/inverter/grid_power_w
solar/inverter/battery_soc_percent
solar/inverter/load_power_w
solar/inverter/daily_yield_kwh
solar/inverter/status
Keep payloads simple. Home Assistant can handle JSON, but one metric per topic is easier to inspect from the command line:
mosquitto_sub -h 10.20.0.20 -t 'solar/inverter/#' -vExample conversion:
pv_power_w = registers[3]
battery_soc = registers[8] / 10
That / 10 is exactly why the manual matters. Many inverters store scaled integers. Some use signed values. Some split 32-bit values across two registers. Some use big-endian word order, some little-endian word order, and yes, that is as fun as it sounds.
Add Home Assistant MQTT Sensors
In Home Assistant, MQTT discovery is convenient, but explicit sensors are easier when learning.
Example:
mqtt:
  sensor:
    - name: "Inverter PV Power"
      state_topic: "solar/inverter/pv_power_w"
      unit_of_measurement: "W"
      device_class: power
      state_class: measurement

    - name: "Inverter Battery SOC"
      state_topic: "solar/inverter/battery_soc_percent"
      unit_of_measurement: "%"
      device_class: battery
      state_class: measurement
Restart or reload MQTT entities, then confirm the values update. Do not build automations until the values are boring for at least a day. Solar data moves constantly; a sensor that looks right for five minutes can still be wrong at sunrise, sunset, grid export, or battery discharge.
Failure Case: No Modbus Response
Symptoms:
- timeout on every read
- no MQTT payloads except errors
- USB adapter appears, but registers never return
Check in this order:
- Is
/dev/ttyUSB0actually the adapter? - Is another process already using the serial port?
- Are A and B reversed?
- Is the slave ID correct?
- Are baud rate, parity, stop bits, and timeout correct?
- Is the inverter Modbus port enabled in its settings?
- Is the bus terminated only where needed?
The boring fix is usually one of the first five. The dramatic fix people try first is replacing the whole gateway. Naturally.
Failure Case: Values Are Wrong but Not Empty
Wrong-but-present is more dangerous than empty. Empty tells you the system is broken. Wrong values smile at you from a dashboard while your automations make bad decisions.
Common causes:
- register address is off by one
- holding register vs input register confusion
- wrong scale factor
- signed value treated as unsigned
- 32-bit word order reversed
- using a register map for a similar inverter model
Fix it by publishing raw registers next to interpreted values for a while:
solar/inverter/debug/registers
solar/inverter/pv_power_w
Then compare against the inverter screen at known states: night, morning ramp, strong sun, battery charging, grid import, and grid export. One sunny minute is not a validation plan.
Failure Case: MQTT Works, Home Assistant Does Not
If mosquitto_sub shows updates but Home Assistant stays blank, the Modbus side is innocent. Stop bullying the RS-485 adapter.
Check:
- topic spelling
- MQTT integration connection
- YAML indentation
- entity disabled state
- retained stale payloads
- units and state classes
For troubleshooting, publish one known value manually:
mosquitto_pub -h 10.20.0.20 -t 'solar/inverter/pv_power_w' -m '1234'If Home Assistant still ignores it, fix MQTT/Home Assistant before touching the inverter code.
Where This Setup Becomes Useful
Once stable, local inverter telemetry can drive real automations:
- run flexible loads when PV export is high
- reduce discretionary loads when battery SOC is low
- notify when inverter status changes
- compare inverter yield against utility meter readings
- store long-term data locally for Grafana or Home Assistant Energy
Keep control actions conservative. Reading an inverter is low risk. Writing settings back over Modbus is a different game. If you decide to write registers, use a separate script, require manual confirmation, and document every writable address. Accidentally reading the wrong register is annoying. Accidentally writing the wrong one is how you earn a story.
Keep reading
Related guides
AI Energy Management With Home Assistant and EMHASS
Use EMHASS with solar forecasts, dynamic tariffs, EV charging constraints and deterministic Home Assistant fallbacks.
Build a Local AI Irrigation System With Soil Sensors and Weather RAG
Combine calibrated soil sensors, local climate history and guarded Home Assistant automations for private, water-aware irrigation.
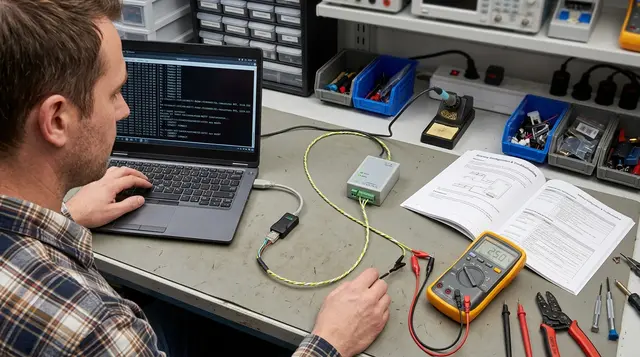
Troubleshoot Modbus RTU to MQTT Inverter Readings
Fix silent RS-485 buses, wrong register values, stale MQTT topics, and Home Assistant sensor problems in inverter telemetry.