How to Migrate a Smart Home From Cloud-Dependent to Local-First
Move cameras, automations, storage, DNS, and remote access toward local-first control without breaking the house in one weekend.
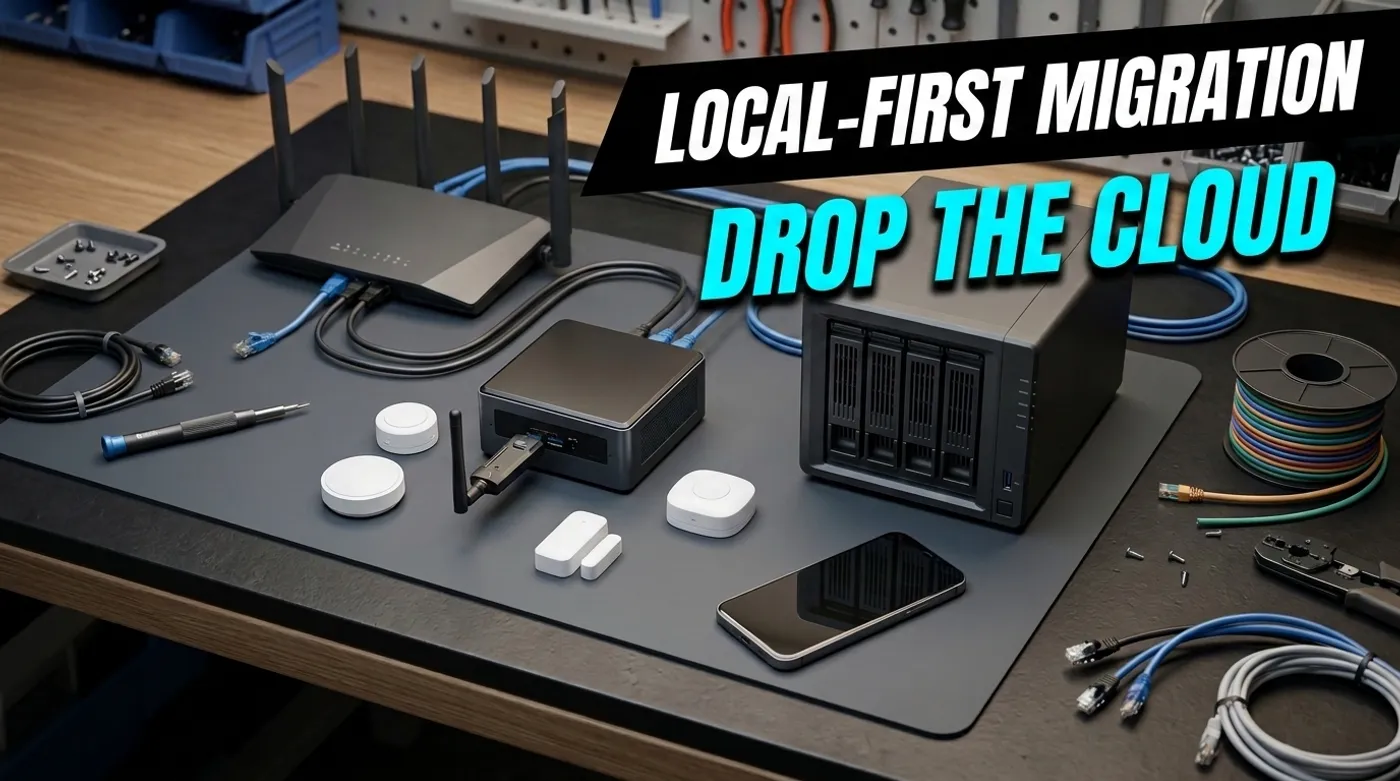
Move cameras, automations, storage, DNS, and remote access toward local-first control without breaking the house in one weekend.
The worst way to make a smart home local-first is to spend a weekend ripping out every cloud device while the family is still using the house. That is how you turn a good architecture idea into a domestic support ticket.
Migrate in layers. Keep the old path working until the local path is proven. Start with observability, then control, then storage, then isolation. Do not begin by blocking every device from the internet and calling the smoke “privacy.”
This is a practical migration plan for a home that already has cloud-dependent devices, apps, cameras, switches, sensors, and maybe a few automations that nobody remembers creating.
The Migration Order
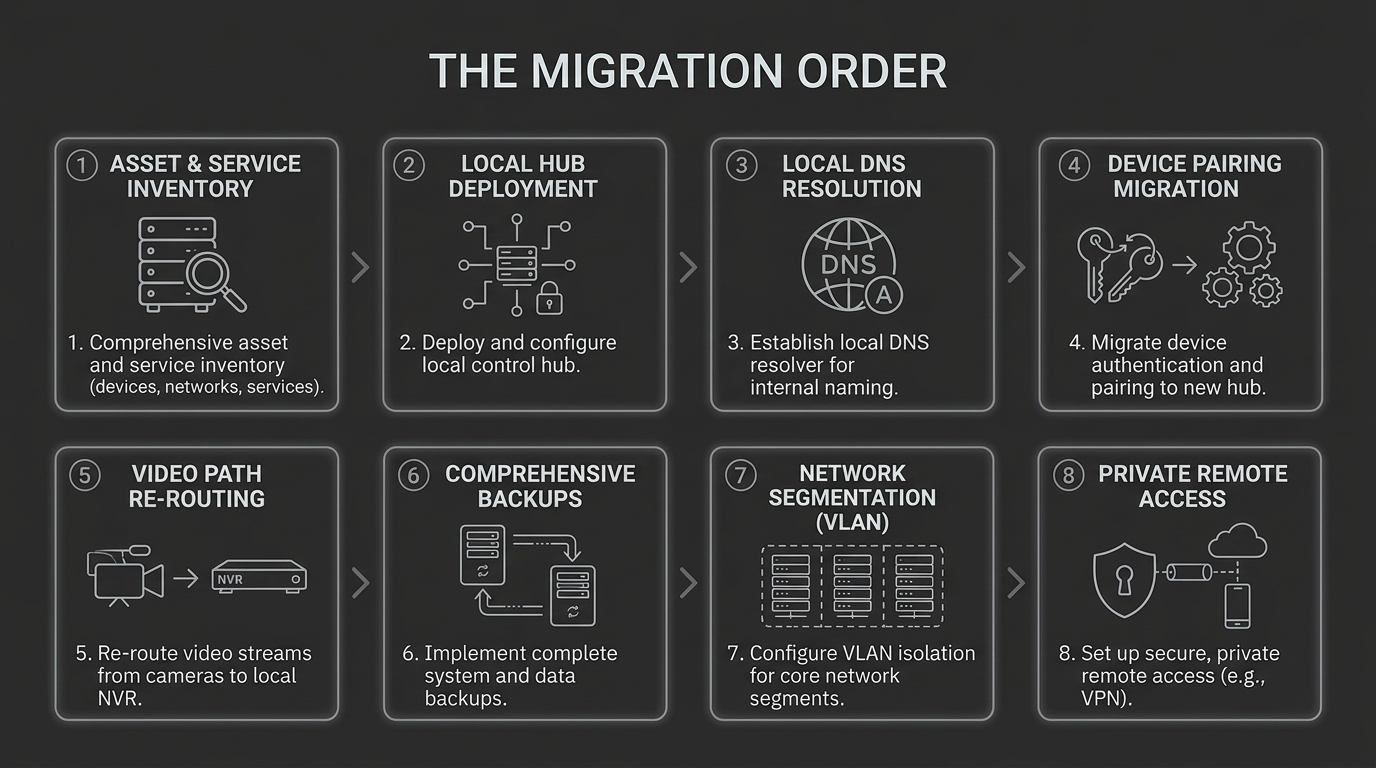
Use this order:
- Inventory what you own.
- Stand up the local control plane.
- Add local DNS and stable IPs.
- Move sensors and switches to local radios where possible.
- Move cameras to local recording.
- Move photos/files/backups to local storage.
- Segment risky devices.
- Replace cloud automations with local automations.
- Add private remote access.
- Only then block or retire cloud dependencies.
This order is slower than a dramatic rebuild. It also has a better chance of surviving contact with real life.
Step 1: Inventory the Cloud Dependencies
Make a table. Boring, yes. Necessary, also yes.
Device / service:
Room:
Vendor app:
Protocol:
Cloud required for:
Local integration available:
Fallback if offline:
Owner:
Keep / migrate / replace:
Example:
| Device | Cloud required for | Local path | Decision |
|---|---|---|---|
| Wi-Fi plug | app control, schedule | maybe local API, maybe none | replace later |
| Zigbee motion sensor on vendor hub | app automation | pair to Home Assistant coordinator | migrate |
| Wi-Fi camera | remote app, cloud clips | RTSP if supported | move to NVR |
| Smart lock | remote unlock, code management | Z-Wave or Zigbee path if supported | test carefully |
| Photo backup app | primary storage | Immich or NAS | migrate separately |
You are looking for two things: devices that can become local, and devices that are cloud-only by design.
Do not replace everything immediately. Some cloud-only devices can stay temporarily if the failure mode is harmless.
Step 2: Stand Up the Local Control Plane
Pick a Home Assistant host:
- Home Assistant Green for appliance-style simplicity
- Intel N100 mini PC for more headroom
- existing home server if it is stable and backed up
- VM only if you understand USB coordinator passthrough and recovery
Add a local radio coordinator:
- Zigbee coordinator for sensors, buttons, bulbs, plugs
- Z-Wave controller for locks, switches, and some North American devices
- Matter controller if your device mix justifies it
Put the controller on a stable USB extension cable, away from the metal server chassis and USB 3.0 noise. This is not superstition. Radio placement affects whether the smart home feels solid or haunted.
Back up Home Assistant before pairing important devices. The current Home Assistant backup workflow supports local, NAS, and off-site locations, and it requires the emergency kit to restore encrypted backups.
Settings -> System -> Backups -> Backup now -> Manual backupIf you run Home Assistant in Docker or a VM, document where the config directory lives and how it is backed up. A local-first migration without backups is just cloud exit cosplay.
Step 3: Create Stable Local Addressing
Before moving devices, make the network predictable.
Representative plan:
Router/firewall: 10.10.0.1
Local DNS:       10.20.0.10
Home Assistant: 10.20.0.20
NAS:            10.20.0.30
NVR:            10.20.0.40
Use DHCP reservations for infrastructure. Do not hardcode random IPs on every device unless you enjoy future archaeology.
Add local DNS names. RFC 8375 reserves home.arpa for this exact residential-network use.
ha.home.arpa   -> 10.20.0.20
nas.home.arpa  -> 10.20.0.30
nvr.home.arpa  -> 10.20.0.40
This keeps the migration readable. It also makes logs, documentation, and dashboards less dependent on someone remembering that 10.20.0.40 is the recorder and not the NAS. Ask me how much fun that is after a router replacement. Actually, do not.
Step 4: Migrate Low-Risk Devices First
Start with devices where failure is annoying but not serious:
- a spare smart plug
- a motion sensor in a hallway
- a button
- a temperature sensor
- a non-critical lamp
Pair them to Home Assistant. Build one small automation. Test it for a week.
Example:
alias: Hallway night light local test
triggers:
  - trigger: state
    entity_id: binary_sensor.hallway_motion
    to: "on"
conditions:
  - condition: time
    after: "22:00:00"
    before: "06:00:00"
actions:
  - action: light.turn_on
    target:
      entity_id: light.hallway_lamp
    data:
      brightness_pct: 20
If this breaks, nobody is locked out, no camera stops recording, and no freezer loses power. Good. That is why you start here.
Step 5: Move Cameras to Local Recording
Cameras are often the biggest cloud dependency.
First check:
- Does the camera support RTSP?
- Does it support ONVIF?
- Can it record to a local NVR?
- Can cloud upload be disabled?
- Does it keep correct time without vendor cloud?
- Does it need DNS or NTP exceptions?
Then build the local recorder:
- Frigate on a mini PC/server
- dedicated local NVR appliance
- NAS surveillance package
- Blue Iris on Windows if that is your chosen path
The camera migration is not just storage. It is also network design. Cameras should not sit on the same trusted LAN as laptops, phones, NAS, and Home Assistant. Put them on a camera VLAN when your router and switch are ready.
Use How to Isolate IP Cameras on a VLAN Without Breaking Local Recording before applying strict firewall rules. The common mistake is blocking so aggressively that the NVR cannot record, then declaring VLANs too hard. VLANs are not too hard. Debugging undocumented firewall chaos is hard.
Step 6: Move Files and Photos Deliberately
Do not migrate personal data casually.
For photos:
- export originals from the cloud service
- preserve metadata where possible
- import into Immich or another local photo system
- keep the old cloud copy until local backups are proven
- run database and media backups
For files:
- create NAS shares by purpose, not by vibes
- separate documents, media, backups, and temporary transfer folders
- set permissions before family members start using it
- create snapshots if the NAS supports them
For backups:
Device -> local server/NAS -> external USB or second NAS -> encrypted off-site copyNo-cloud does not mean no off-site. It means the cloud is not the only place your data exists or the only interface you can use to reach it.
Step 7: Replace Cloud Automations One at a Time
Do not recreate every automation from the vendor app in one sitting.
For each automation:
Trigger:
Conditions:
Action:
Expected delay:
Failure mode:
Manual override:
Cloud dependency removed:
Example:
Old:
  Vendor app turns porch light on when doorbell detects motion.

New:
  Local camera/NVR event or motion sensor triggers Home Assistant.
  Home Assistant turns on porch light for 5 minutes.
  Doorbell cloud notification remains optional during transition.
Keep both paths briefly only if they do not conflict. Duplicate automations can cause odd behavior: lights toggling twice, locks relocking, notifications arriving from three apps like a very small crisis team.
Once the local automation is stable, disable the cloud version.
Step 8: Segment After You Understand Traffic
Network segmentation is powerful. It is also a great way to break things if you apply it before knowing what talks to what.
Suggested sequence:
- Put guest Wi-Fi on its own network.
- Move cameras to a camera VLAN.
- Move IoT Wi-Fi devices to an IoT VLAN.
- Keep servers and Home Assistant on infrastructure.
- Allow only required flows.
Example rules:
| Source | Destination | Rule |
|---|---|---|
| Home Assistant | IoT VLAN | Allow required device APIs |
| IoT VLAN | Infrastructure | Deny new connections by default; stateful return traffic remains allowed |
| NVR | Camera VLAN | Allow RTSP/ONVIF and required management ports |
| Camera VLAN | WAN | Deny after local recording is proven |
| Guest VLAN | LAN | Deny |
Do not block WAN for every IoT device on day one. First observe. Some devices need internet for firmware updates, time sync, or app provisioning. Decide what to allow intentionally. “Block everything and see who screams” is sometimes useful in a lab, less useful when the thermostat joins the performance. NIST’s IoT guidance supports segmentation; it does not excuse undocumented rules that break the control path.
Step 9: Add Private Remote Access
Once local services work at home, add remote access.
Preferred patterns:
- WireGuard into the home network
- Tailscale-style private overlay
- NetBird-style private overlay
- reverse proxy only for carefully selected public services
Avoid:
- raw port forwards to Home Assistant
- public NAS admin panels
- public camera admin pages
- exposing every Docker dashboard because internal DNS annoyed you once
Remote access should be scoped. Your phone away from home may need ha.home.arpa and photos.home.arpa. It does not need admin access to the switch, router, every camera, and every experimental container.
Step 10: Run the No-WAN Test
Before retiring old cloud paths, test:
- Home Assistant dashboard loads locally
- key automations run
- camera recording continues
- NAS files open
- local DNS resolves internal names
- local backups run
- phones can control local devices while on Wi-Fi
- smart locks and access devices still have manual fallback
- WAN disconnect does not create stale dashboards that look live
Disconnect WAN for 30 minutes during a low-risk window. Do not do this five minutes before leaving the house. That sounds obvious, which means someone absolutely needs to read it.
What to Replace, What to Keep
Replace sooner:
- cloud-only cameras with no RTSP or local recording
- devices with dead vendor apps
- Wi-Fi plugs that cannot be controlled locally and matter to automations
- hubs that hide all state in an app
- devices that fail dangerously when offline
Keep temporarily:
- low-stakes lights
- decorative devices
- voice assistant conveniences
- app-only features that are useful but not critical
- devices scheduled for replacement later
Keep permanently if acceptable:
- cloud services used only for off-site encrypted backup
- push notification services
- optional remote sharing
- firmware update paths
The goal is not a museum-quality offline bunker. The goal is a house where important functions keep working locally and cloud services are chosen, not required.
Final Rule
Migrate the boring layers first: addressing, DNS, Home Assistant, backups, and one low-risk automation. Then move cameras, storage, and access control. Then tighten the network.
If you start by blocking cloud access everywhere, you will learn a lot very quickly, mostly in the form of complaints. Build the local path, prove it, document it, back it up, and only then remove the old dependency.
That is how you move to local-first without making everyone in the house hate local-first.
Keep reading
Related guides
Reduce Food Waste With Local OCR, Private RAG and Fridge Photos
Turn fridge photos into a private local inventory with OCR, recipe retrieval and honest date-label alerts that require confirmation.
Build a Digital Home That Still Works Without the Internet
Design a local-first digital home where lights, locks, cameras, automations, files, and dashboards keep working during internet outages.
Local-First vs Cloud-First Smart Home: What Actually Changes
Compare local-first and cloud-first smart homes by latency, ownership, outages, privacy, backups, updates, and remote access.