Do Not Buy a Wi-Fi Camera Before Understanding NVR Recording
A Wi-Fi camera with only an internal SD card can lose the evidence with the camera. Use a local NVR and small UPS plan instead.
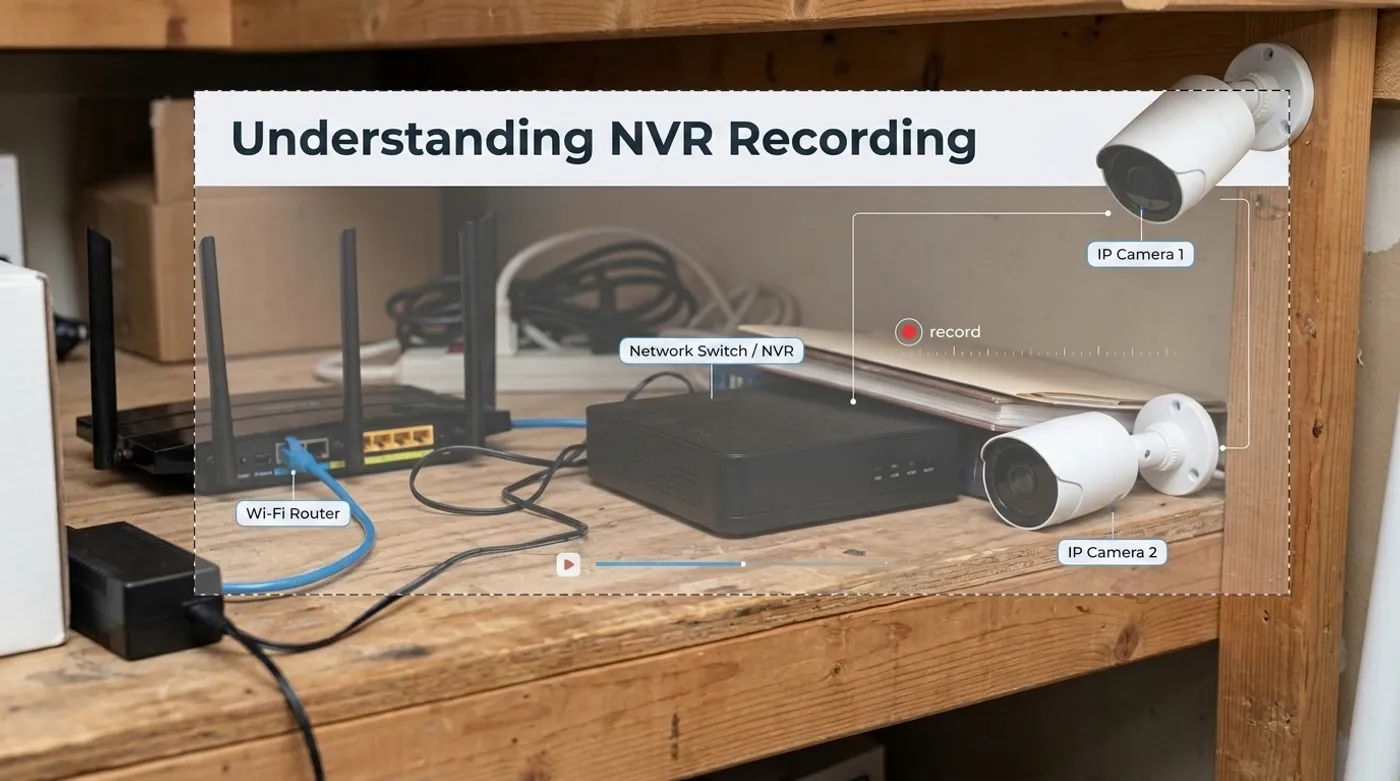
A Wi-Fi camera with only an internal SD card can lose the evidence with the camera. Use a local NVR and small UPS plan instead.
Most people buy a Wi-Fi camera and think the job is done because the camera has a microSD slot. That works until the one person you actually wanted to record takes the camera with them.
Then you lose the camera and the footage at the same time. It is a very simple failure mode, which is why it gets missed so often.
The better pattern is to make the camera disposable and the evidence harder to reach. That means the camera records somewhere else: a local NVR hidden inside the house, preferably on backup power, preferably not sitting next to the camera it protects.
The SD Card Problem
Internal camera storage is convenient, but it puts the recording inside the device most likely to be stolen, smashed, unplugged, or reset. It also creates a maintenance problem: every camera becomes its own tiny recorder, with its own storage health, overwrite behavior, time settings, and mobile app quirks.
That is acceptable for a baby monitor or a casual driveway view. It is weak for security evidence.
If the camera only records to itself, your evidence chain depends on the attacker leaving the device behind. That is not a plan. That is optimism with a mounting bracket.
What a Wi-Fi NVR Actually Solves
An NVR, or Network Video Recorder, is the recorder that sits somewhere else on the network. The cameras send video to it. The NVR stores the footage on its own drive or SD card. If someone steals an exterior or indoor camera, the clip can still be sitting on the recorder.
A small Wi-Fi NVR can be hidden in a rack, cabinet, closet, or network shelf. It can look boring. That is the point.
For a home setup, the architecture is usually:
Wi-Fi cameras
  -> home router / camera network
  -> wired NVR on Ethernet
  -> local hard drive or SD storage
  -> optional monitor, app, or remote access
The NVR should not be treated as decoration next to the camera. Put it where a casual intruder is unlikely to notice it.
A Practical Example: 8-Channel Wi-Fi ONVIF NVR
The kind of kit worth looking at is an 8-channel Wi-Fi ONVIF NVR, such as the Kerui 2K / 3K / 4MP 8CH Wi-Fi ONVIF class of recorder. Treat this as a product class to test, not a guarantee that every listing, firmware build, or bundled camera behaves the same way. The important part is not the brand name. The important part is the operating model:
- it can record multiple IP cameras at once
- it supports ONVIF-style camera discovery and compatibility
- it can store footage on a hard drive or SD card, depending on the model
- it can overwrite old recordings in a loop
- it can output locally over HDMI to a TV or monitor
- it can keep recording without requiring every clip to live in a vendor cloud account
Eight channels is enough for a normal home layout: front door, driveway, garage, side gate, backyard, hallway, and maybe one or two spare positions. If the recorder supports only two cameras today but you already know you will add more later, you are buying the upgrade twice.
ONVIF Is Useful, but Do Not Treat It Like Magic
ONVIF is the compatibility layer that lets many IP cameras and recorders discover each other and exchange video streams. It is the reason a camera from one vendor can often work with an NVR from another vendor.
It is useful. It is not a guarantee that every feature will work perfectly.
Basic video recording is the first thing to test. PTZ controls, motion events, two-way audio, smart detection, and dual-lens modes may depend on vendor-specific behavior. If you buy a dual-lens PTZ camera, verify that the NVR sees the streams you actually care about before mounting everything permanently. Also confirm that the recorder keeps the correct time after a reboot; wrong timestamps can make good footage much harder to use later.
The practical test is boring and important:
- Connect the NVR to the router with Ethernet.
- Add one camera.
- Confirm live view.
- Confirm recording.
- Reboot the camera.
- Confirm the NVR reconnects.
- Pull a clip from the previous hour.
Do that before installing six cameras and calling it done.
The NVR Still Needs Ethernet
Many Wi-Fi NVR kits are misunderstood because of the word Wi-Fi. The cameras may connect wirelessly, but the NVR itself usually still needs a wired Ethernet connection to the router.
That is not a weakness. It is what you want.
The recorder should have the most stable path on the network. Wi-Fi cameras already introduce enough uncertainty: distance, walls, interference, power supplies, and router placement. Do not add another weak wireless hop between the recorder and the rest of the network unless the model explicitly supports it and you have tested it under load.
Plan on this:
NVR -> RJ45 Ethernet -> router or switchThen plan the camera distance realistically. A vendor may claim something like 50 meters in open air. Your house is not open air. Walls, metal doors, foil insulation, brick, electrical panels, and bad router placement all reduce range.
If a camera is at the edge of signal, it may still show live video while dropping frames during recording. Security systems fail quietly when the RF margin is bad.
Storage: Hard Drive, SD Card, and Loop Recording
Loop recording is the feature that makes the system low-maintenance. When the drive fills, the NVR deletes the oldest footage and keeps recording. That is normal for surveillance.
The storage choice decides how many days you keep:
- 500 GB can be enough for a small number of cameras with modest bitrate and motion-based recording.
- 1 TB or 2 TB is safer for more cameras, higher resolution, or longer retention.
- SD card storage can work for compact systems, but it is not my first choice for a recorder that matters.
For anything you actually care about, use storage designed for continuous write workloads. Surveillance footage is not like storing family photos. It writes constantly, overwrites constantly, and fails at the worst time if you ignore it.
Local Viewing vs Remote Viewing
HDMI output is underrated. Plugging the NVR into a TV or monitor gives you a simple local CCTV-style view without opening an app, waiting for cloud login, or depending on a phone.
Remote viewing is where you should slow down.
Some kits use apps such as iCSee for mobile access. That can be convenient, but it is not the same thing as a local-first architecture. Remote app access may use vendor accounts, cloud relay, or peer-to-peer services depending on the model and configuration.
If privacy matters, treat remote viewing as optional:
- keep local recording working first
- change default passwords
- update firmware before exposing anything
- avoid port forwarding the NVR directly to the internet
- prefer VPN access when possible
- block unnecessary outbound traffic from cameras if your network supports it
The NVR exists to keep your footage local. Do not accidentally rebuild a cloud dependency just because the app setup wizard is easy.
If your router or switch supports VLANs, the next step is to separate camera traffic from the rest of the home network. The detailed version is in How to Isolate IP Cameras on a VLAN Without Breaking Local Recording, but the short version is simple: let the recorder reach the cameras, do not let the cameras roam across the LAN.
Hide the Recorder, Not the Problem
The NVR should be physically separated from the cameras. If the camera is at the front door, the recorder should not be in the same room by the front door. If the camera is in a garage, the recorder should not be sitting on the garage workbench.
Good places:
- network rack
- closet shelf
- locked cabinet
- utility room
- office cabinet with the router and switch
Bad places:
- next to the camera
- in plain view under a TV
- on the same power strip as everything obvious
- inside a hot sealed box with no airflow
The goal is not to make the NVR impossible to find. The goal is to make it unlikely that a quick theft also removes the recording.
The Power Failure Problem
A camera system that dies when the power flickers is not a security system. It is a decoration with firmware.
You do not always need a giant centralized UPS for the whole house. For small home security builds, a modular backup plan is often easier:
- one small DC UPS for the router or modem
- one small DC UPS for the NVR
- separate backup for cameras that need local power
- PoE UPS if the cameras use Power over Ethernet
A Mini DC UPS can be useful here because many small network devices run on DC outputs such as 5V, 9V, 12V, or 24V. The exact voltage matters. Do not guess. Match the device label and connector polarity before plugging anything in.
The class of device I mean is a compact multi-voltage Mini DC UPS for routers, modems, and IP cameras. The price can be low enough that it makes sense to back up a few critical devices independently instead of building one oversized backup system on day one.
Example product class:
That link is an example of the category, not a reason to skip checking voltage, runtime, battery chemistry, safety markings, and connector fit.
What I Would Check Before Buying
Before buying a Wi-Fi NVR kit, I would check these items:
- Camera count: buy enough channels for the cameras you expect to add, not just the cameras you own today.
- ONVIF support: verify the camera and NVR can exchange the video streams you need.
- Storage included: check whether the kit includes a hard drive, what size it is, and whether it is surveillance-friendly.
- Ethernet requirement: assume the NVR needs RJ45 Ethernet to the router.
- Wi-Fi range: treat open-air range claims as optimistic.
- Local monitor support: HDMI output is useful when the phone app is unavailable.
- Remote access model: understand whether the app depends on a vendor cloud account.
- Backup power: plan router, NVR, and camera power before the first outage.
The Kerui 2K / 3K / 4MP 8CH Wi-Fi ONVIF style kit is interesting because it bundles the recorder, storage, mouse, and cameras into a low-cost package. That is practical for a first NVR build. Just do not confuse cheap and complete with maintenance-free.
The Better Security Pattern
The real upgrade is not “buy this one recorder.” The real upgrade is changing where the evidence lives.
A camera with only an SD card keeps the evidence inside the target. A local NVR moves the evidence to a separate device. A hidden recorder makes casual theft less useful. Backup power keeps the system alive through short outages. Network isolation keeps the cameras from becoming their own security problem.
That is the pattern:
Camera captures.
NVR records.
UPS keeps the network alive.
Router controls access.
You keep the footage.
If you are still relying only on a microSD card inside each camera, fix that before you buy more cameras.
Keep reading
Related guides
Camera VLAN Not Working: Fix NVR, RTSP, DNS, and Firewall Issues
Diagnose camera VLAN failures when streams, NVR access, NTP, DNS, firewall rules, or isolated mobile viewing stop working.
Build an Offline Multimodal Voice Assistant for Home Assistant
Build a local Home Assistant voice pipeline with wake word, speech, Gemma 4 context, allowlisted actions and spoken responses.

How Much Hardware Does a Private ChatGPT Actually Need?
Size CPU, RAM, VRAM and storage for Open WebUI, Ollama, local RAG and multiple users without buying an oversized AI server.