Emergency Home Automation Without False Alarms
Build local-first emergency alerts with sensor confirmation, trusted contacts, panic buttons, and manual escalation instead of reckless 911 automation.
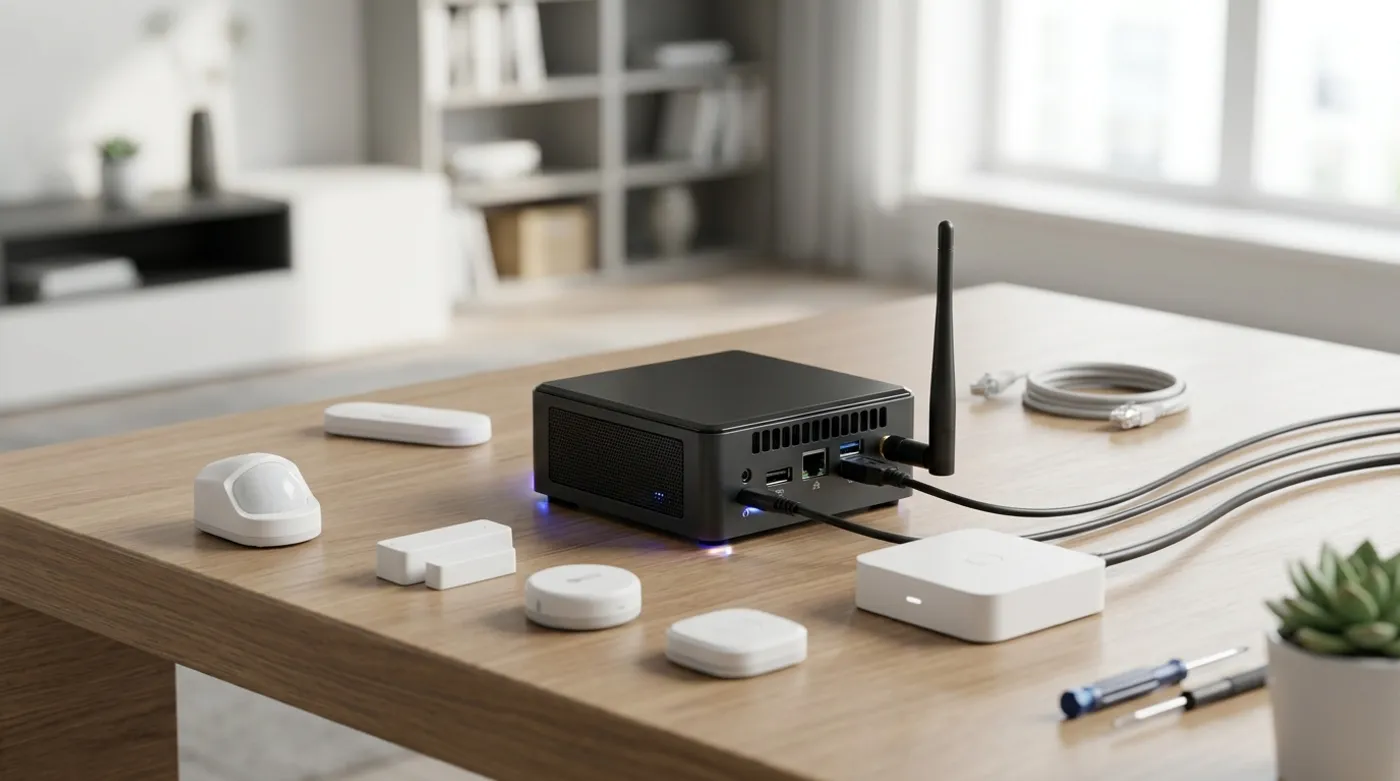
Build local-first emergency alerts with sensor confirmation, trusted contacts, panic buttons, and manual escalation instead of reckless 911 automation.
The fastest way to turn a smart home into a liability is to automate an emergency call from a single sensor event. A door opens, a cheap contact sensor glitches, a pet jumps near a window, and the system tries to call 911.
That is not security. That is bad engineering with legal consequences.
Protecting your family and your home is serious work. Crime is real. Fire is real. Medical emergencies are real. But emergency escalation needs context, confirmation, and a human decision point unless you are using a certified monitoring service that is designed to handle dispatch responsibly.
The architecture that actually makes sense is local detection, multi-step confirmation, trusted-contact alerts, local alarms, physical cancel controls, and manual escalation when the evidence supports it.
The Rule: One Event Is Not an Emergency
A single event means almost nothing by itself. A back door opening at 2:17 AM might be an intrusion. It might also be a family member, bad latch, sensor battery issue, automation bug, or someone letting the dog out.
Safe emergency automation starts by refusing to panic from one input.
The correct flow is closer to this:
Door opened at night
  -> check motion in adjacent room
  -> check owner presence
  -> start local warning beep
  -> send camera snapshot to trusted phones
  -> wait for cancel or confirmation
  -> escalate siren / contacts / manual emergency call
The point is not to make the system slow. The point is to make it hard for a single bad sensor to embarrass you, fine you, or train responders to ignore your alerts.
The Confirmation Architecture
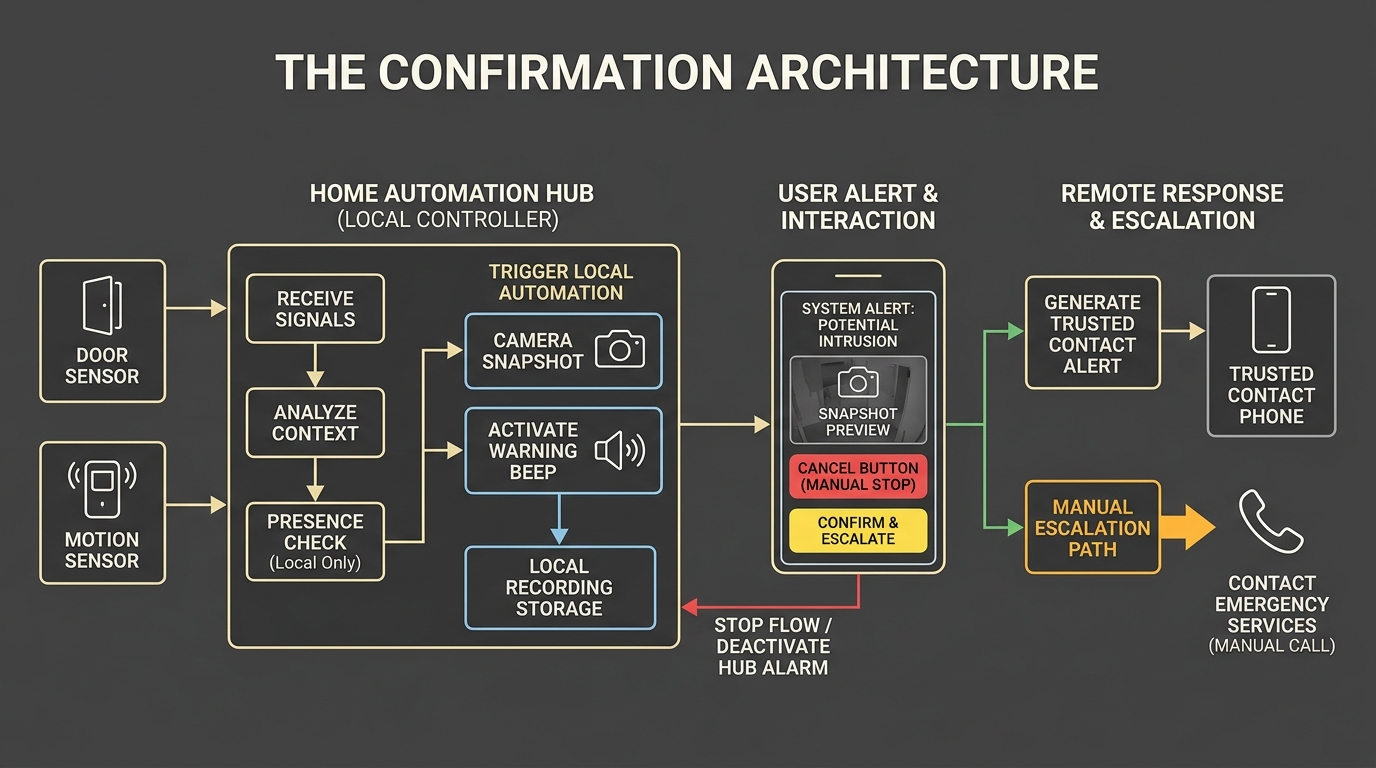
The version I would trust has five checkpoints:
- Detection: a door contact, window sensor, motion sensor, smoke alarm relay, panic button, or absence-of-motion rule produces an event.
- Context: the system checks time, home/away mode, known phone presence, recent motion, and nearby sensor activity.
- Local warning: the house makes a controlled local sound first, such as a warning chime or short siren pulse.
- Remote evidence: trusted phones receive a push notification with useful context: which sensor, which room, camera snapshot, and cancel/confirm options.
- Escalation: a human, trusted contact, or certified monitoring service decides whether to call emergency services.
That is the difference between automation and negligence. Same sensors, very different judgment.
What You Should Monitor
Some events deserve automation. They just need the right failure model.
Intrusion: Use door/window sensors with PIR or mmWave motion confirmation. A perimeter sensor is useful, but a perimeter sensor plus motion in the next room is much stronger.
Smoke and gas: Use certified detectors. Do not depend on a generic development board and a random gas module as the life-safety device. The smart home can listen for the alarm, relay the alert, and notify you, but the primary detector should be certified for the job.
Panic and falls: Place physical buttons in boring, reachable places: bedroom, bathroom, garage, bedside table, near an elderly relative’s chair. A phone app is not enough when someone is disoriented or on the floor.
No-motion checks: If an elderly family member lives alone and the home normally sees kitchen or hallway motion by 10 AM, no movement can trigger a check-in alert. That should notify family first, not dispatch emergency services from an assumption.
Camera evidence: Use RTSP cameras and a local NVR when possible. A snapshot attached to a push alert is often the difference between “something happened” and “I can see a person at the back door.”
Avoid putting cameras in private rooms, bathrooms, or anywhere a normal guest would not expect recording. Security evidence is useful only if the system is legal, proportionate, and acceptable to the people who live there.
For the camera side of this design, do not rely only on a microSD card inside the camera. A local recorder is a better evidence pattern, and the network side should follow the isolation model in How to Isolate IP Cameras on a VLAN Without Breaking Local Recording so camera footage helps the alarm flow without giving every camera broad LAN access.
Local-First Is Not Optional Here
If your emergency logic depends on a cloud server, you do not fully control the emergency logic. Internet outage, vendor outage, account lockout, API change, expired subscription, DNS failure, and app notification delays all become part of your security architecture.
For home safety, local-first should be the baseline:
- Home Assistant runs inside the house on a mini PC or Raspberry Pi-class host.
- Zigbee or Z-Wave sensors report locally through a USB coordinator.
- Zigbee2MQTT or Z-Wave JS keeps device events inside the LAN.
- MQTT stays local.
- ESP32 boards handle wired buttons, relays, status LEDs, and siren triggers when needed.
- Router, modem, Home Assistant host, and critical network gear sit on a UPS.
- Cameras record locally to an NVR, NAS, or small server.
The internet can still be useful for remote push notifications. It should not be required for the siren, local warning, local dashboard, or basic event processing.
If you do use cellular backup, test the whole path during an actual WAN outage. A backup modem that is powered but not routed correctly is just a blinking placebo.
Hardware Stack That Actually Makes Sense
A practical emergency automation stack does not need to be exotic:
- Home Assistant: the central automation engine.
- Mini PC or Raspberry Pi-class host: the local controller.
- Zigbee USB dongle: local radio for sensors and buttons.
- Zigbee2MQTT: local device bridge and better visibility into events.
- Door/window sensors: perimeter detection.
- PIR and mmWave sensors: motion and presence confirmation.
- Certified smoke and gas detectors: real life-safety devices.
- Physical buttons: cancel, panic, and assisted-living check-in.
- Indoor and outdoor sirens: staged escalation, not immediate full panic.
- RTSP cameras: local snapshots and evidence.
- Local NVR: footage survives camera theft and cloud outages.
- UPS: keeps modem, router, Home Assistant, and NVR alive during short outages.
The equipment is not the hard part. The hard part is refusing to write dumb automations.
If you are buying cameras before building the alert logic, read Do Not Buy a Wi-Fi Camera Before Understanding NVR Recording first. The emergency automation is only as good as the recording path that survives the event.
Home Assistant Logic That Reduces False Alarms
False positives are usually caused by lazy logic. The fix is to make the automation earn its escalation.
Require Multiple Sensors
Do not fire the full alarm from one door contact.
Better logic:
Back door opens
AND kitchen motion is detected within 10 seconds
AND house mode is armed_night or armed_away
THEN start warning sequence
This does not make intrusion detection perfect. It makes it harder for one flaky sensor to ruin your night.
Use Presence Carefully
Phone presence is useful, but it is not absolute truth. Phones die, Wi-Fi sleeps, Bluetooth can be unreliable, and geofencing can lag.
Use presence as one signal:
Owners away
AND perimeter opened
AND indoor motion detected
AND no trusted phone on Wi-Fi
That is much better than “door opened, call everyone.”
Add a Delay With a Physical Cancel Button
The best false-alarm control is often physical.
If a protected door opens, the house can start a 30-second warning beep. During that window, a hidden Zigbee button or ESP32 button near the entry can cancel the alarm.
This works because real people forget to disarm systems. Apps fail. Phones are in pockets. A physical cancel button gives the household a low-friction way to say: this is me, stand down.
Do not put the cancel button in plain sight next to the door. Make it reachable for residents but not obvious to a stranger.
Use Time Windows
Not every sensor deserves the same response all day.
Examples:
- backyard motion after 11 PM: notify with snapshot
- backyard motion at 2 PM: log only
- garage interior motion while away: high priority
- hallway motion at night while everyone is home: probably normal
Time windows are not security by themselves, but they reduce noise. A noisy security system gets ignored.
Stage the Siren
Use stages:
Stage 1: soft beep for 30 seconds
Stage 2: indoor siren pulse
Stage 3: push trusted contacts with snapshot
Stage 4: full siren after manual confirm or stronger sensor evidence
The full outdoor siren should mean something. If it screams every time a sensor battery gets weird, the neighborhood will learn to ignore it.
Example Automation Flow
This is the kind of logic I would trust more than a single-trigger panic script:
Trigger:
  Back door contact opens between 23:00 and 06:00

Conditions:
  Alarm mode is armed_night or armed_away
  No trusted phone is currently on the LAN

Confirmation window:
  Wait up to 10 seconds for kitchen PIR or hallway mmWave presence

If confirmed:
  Turn on hallway and kitchen lights
  Play 30-second warning beep indoors
  Send push notification with camera snapshot to trusted contacts
  Start 30-second cancel timer

If cancel button is pressed:
  Stop siren sequence
  Log event as canceled locally

If not canceled:
  Trigger indoor siren
  Send second alert marked "requires human confirmation"
  Provide quick actions: confirm intrusion, cancel, call neighbor

If human confirms:
  Trigger outdoor siren
  Call emergency services manually or through certified monitoring
That is slower than a reckless one-line automation. It is also much less likely to create a false dispatch.
Do Not Automate 911 From Home Assistant
Do not build a script that directly calls 911 or the police from Home Assistant because one sensor changed state.
There are legal, operational, and ethical problems with that:
- false alarm fines are real in many jurisdictions
- emergency dispatch rules vary by location
- automated calls may not provide usable context
- repeated false alarms can get ignored
- first responders should not be dispatched because a hobby sensor glitched
If you want automatic dispatch, use a certified monitoring service that is built for alarm verification, jurisdiction handling, call center procedures, and local compliance.
For a self-hosted home system, the responsible pattern is alert people, provide evidence, and let a human decide.
Cost Ranges
You can build this in stages.
Basic but useful: $100-$250
- Home Assistant host you already own or a cheap mini PC
- Zigbee dongle
- door sensors for main entry points
- a few motion sensors
- one or two physical buttons
Robust alerting: $300-$800
- better presence sensors
- more perimeter coverage
- indoor siren
- smoke/gas detector integration
- UPS for the network core
- more physical cancel/panic buttons
Full local-first protection: $700-$1,500+
- RTSP cameras
- local NVR or NAS
- UPS for modem, router, Home Assistant, and recorder
- outdoor siren
- better network segmentation
- backup internet if needed
The right number is not the most expensive number. The right number is the minimum system that reliably detects, confirms, records, alerts, and survives short outages.
Final Rule
Emergency automation should make you calmer, not louder.
The serious version of smart home security does not pretend a $12 sensor is a sworn witness. It asks for context. It confirms with another sensor. It records locally. It wakes the right people. It gives the household a physical way to cancel mistakes. It keeps working when the internet fails. And when something truly serious happens, it puts a human or certified monitoring service in the dispatch path.
That is how you protect your home without turning your automation system into the boy who cried wolf.
Keep reading
Related guides
Build an Offline Multimodal Voice Assistant for Home Assistant
Build a local Home Assistant voice pipeline with wake word, speech, Gemma 4 context, allowlisted actions and spoken responses.
Build an Offline Care Assistant for Older Adults or Pets
Combine local voice, fall signals, medication reminders and family alerts without turning a home lab into a medical device.
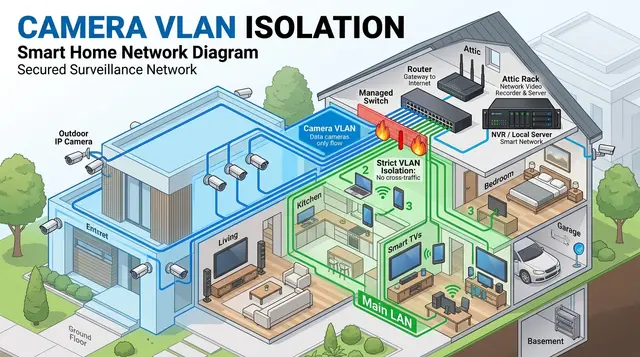
How to Isolate IP Cameras on a VLAN Without Breaking Local Recording
Learn the mental model for isolating IP cameras on a VLAN while keeping local NVR recording, NTP, DNS, and admin access predictable.